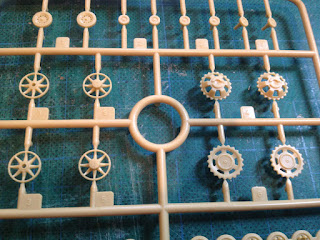
This is my second kit from this company (the first was a King Tiger), and I like it. I bought it 'cause I wanted to build a knocked out tank. So I had a look through several of my Panzer Wrecks titles. I was somewhat surprised how few Pz IIIs there are in the editions of the Panzer Wrecks series I happen to have.
The main bits.
Strange how they have the commander figure on the track sprue!
More bitzenbobz...
Very nice finely moulded running gear!
And the last bits, inc. instructaloids.
A contender for the most paltry decal sheet ever?
Prepping parts for the running gear.
So I wound up using images of Pz IVs, instead. The kit has schurzen, on both turret and body. I noticed many tanks lose their body armour, and yet retain the turret armour. Numerous wrecked Pz IV in the books I was referring to are in this state: schurzen up top, but not below.
I also wanted to create battle damage, and this kit, quite chunky, presented some challenges in doing that. I also wanted numerous hatches open. Again, not always easy, with this kit. For example, the styrene behind the turret side hatches is very thick. So instead I had the schurzen open, instead.
A combo of mine damage and a shell penetration ...
... have upset this side.
This side is mostly unscathed.
The wheels as supplied are mostly on two pairs of large strips, to make construction easier. Sometimes I would go with this type of arrangement. But in this instance I knew I wasn't going to go with it, for two reasons: first, the joining parts would be all too visible, and detract form the realism o' the resulting model; second, as a battle-damaged tank, I want the wheels all wobbly and out of alignment.
Turret cupola surgery.
The bulk is built.
Getting into detailing some battle damage.
The commander's hatch is designed to be open. But I didn't want to use the commander figure. The tank is going to be empty/abandoned. I sawed off the 'bucket' below the cupola. I also modelled the storage bin at the back of the turret open, and put some crew gear in it.
Battle damage wise, this tank drove over a mine, throwing off the track. Once immobilised, it's been hit low in the hull, rught where the mine blew up, more or less. There's a shell penetration in the lower forward hull, which has blow a return roller off, and some bent fenders and schurzen, and a few smaller caliber penetrations in the turret armour. The return roller that's been knocked out of position has also come apart, and some of the wheels near the point of the two impacts are knocked out of alignment.
Starting to add stowage.
Turret bin open...
Some growage of stowage. Plus opening turret schurzen.
Poor scribing this side.
Track sag.
Track sag is always a nice touch. but it's not always easy to achieve, and depends to quite a large degree on the type of track the kit uses. This kit has tracks of the better than average but won't glue with model glue variety. I had to glue them using Gorilla Glue superglue gel. The tracks are decent enough looking, detail wise. And I'm pleased with the overall effect.
Much more drastic track sag.
Adding some detail/interest to the rear engine deck.
I really want to start finishing some of my models. This one is intended to be a diorama. But hopefully also one I can still deploy on a wargame table, if desired. Most of my builds thus far have been with mid to late war stuff in mind. But this is finished in earlier war dark grey. I'm hoping I might learn to get better at single colour paint jobs. At present it's just blocked in. Weathering and shading are yet to be begun.
Started work on a base.
Halford's grey basecoat.
Revell dunkelgrau, decals, and a little blocking in of colours.
I don't think I'll be buying the Revell dunkelgrau spray can I used on this again. It took most of the rather small can to do this one model. And at about £5 a can, or thereabouts, that's simply too much. I don't know if I'll regret it, but I decided to put the decals on - using transfers from my spares box - at this stage. I'll work on shading and weathering over and around them, being careful not to obscure them altogether.
I'll end this post for now with a few more pics of the tank as she looks at close of play today. There's still a long ways to go. But at least I'm further on with her than with most models I post, where I more or less stop once construction is complete. I must get better at finishing stuff!
I'm quite pleased with progress so far.
Markings make such a difference!
The open hatches add some interest.
I like this view from the rear, with added suff, and open turret bin.
Just need to work on making the paint job more interesting!
To conclude, I really like the two Forces of Valor models I've built so far. They're less than half the price of certain other brands; Dragon, for example, have long been very expensive. But more recently, and rather depressingly, Revell kit prices at my local shop have gone up to similarly over-inflated levels. These FoV kits are, currently, cheaper than those hoary ol' Airfix 'vintage classics'!!! And they build into really quite good models, esp. with a bit of effort. It's a shame the range is, at present, really rather limited.


No comments:
Post a Comment