Back when I were a nipper, one of the few 1/35 tanks I built was a fairly shoddily constructed and even more cruddily painted Tamiya Panzer III or IV. As kid I could very rarely afford these larger more de-luxe kits, despite the fact that kits back then were a lot, lot, lot cheaper, both literally and relatively [1] than they are now.
The pic below is from the Tamiya website, and shows a Panzer IV with a set of Panzergrenadiers. I chose this pic 'cause none of the box covers jibes with my memory of the model I built! And, as far as my memory serves, I had the tank and the figures shown below. Mine were never built or painted to that standard though!
Tamiya 1/35 Pz. IV & Panzergrandiers.
Even now, as an adult with my own funds to dispose of as I see fit, I'm sticking to 1/72 on the whole, for reasons of increased fun via affordability! And my recent stash of four kits for a tenner at Salute was a wonderful thing. Currently on model three of that batch, I'm still very much enjoying that well-spent tenner!
This Fujimi kit is noteworthy for a couple of reasons: 1) it has a BMW motorcycle and sidecar thrown in (with two riders), which is a nice little addition to my growing WWII German armoured contingent, currently very scanty as regards light vehicles and supporting stuff, such as trucks, cars, artillery, and suchlike; 2) There's quite a lot of interior detail. Most WWII tank models I've bought and built so far don't have any of this. The only exception so far being the Attack AufklPz 38 Hetzer 7/5, which, like all but the Airfix Panther and Academy Kettenkrad, whilst completely built, is still unfinished at present, due to painting constraints. The AufklPz 38 Hetzer 7/5 has an open-topped fighting compartment though, whereas the Panzer IV ain't.
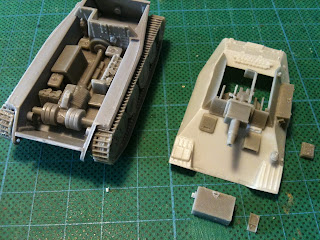

Due to this detail - which includes having many more of the hatches separate from the hull and turret than is normal with kits of this sort (allowing them to be modelled open) - and the fact that I have a few support vehicle models waiting in the wings - a 1/72 Trumpeter Sd.Kfz. 9/1 Famo with Bilstein crane, and a 1/76 Milicast Bergepanzer III - I want to build this with the crew (mostly, or perhaps all?) outside the tank, with many of the hatches open, as if the vehicle is undergoing behind the lines rest/maintenance.
I've spent way too much time very inefficiently searching for information, in particular on the engine compartment hatches at the rear of the vehicle, as it's the right-hand rear hatch that I want to model in the open position. Rather oddly, some of the numerous hatches have interior detail moulded on, meaning modelling them open is pretty straightforward, whilst others don't, meaning additional detailing is required.
I found all sorts of interesting and useful stuff, such as this:
http://panzerivuniverse.phelpscomputerservices.com/Default.htm
... but almost nothing that was clearly what I was after. Until I found an article about a
Panzer IV restoration at the Musée des Blindes website, which included this picture:
If this proves to be what I'm looking for - and it does look to me very much like the section I intend to show in the open state, then it will involve me in my first serious bit of 1/72 scratch-building. A daunting and yet exciting prospect! So, having had a longer than usual preamble to this kit build/review, here's the box contents: two main sprues, with the bulk of the model, a third small sprue with most of the wheels, the rubber-band tracks, and the instructions.


As is so often the case, construction commences with running-gear and chassis elements. These are all well moulded with very little flash, and fit together crisply and cleanly. The little upper rollers (do they have a technically correct name? I expect they do) were the only slightly tricky part, as they were two-part, and the inner wheel of each pair had a fairly large degree of movement, with no indication of correct alignment. I just squeezed them together in the outermost position they could occupy, and hoped that was correct.
The running gear assembled, and looking pretty good, it's time to construct the lower hull and engine, etc. The figure of a tank commander (the same figure is also included in the Fujimi Tiger I model bought in the same Salute 2015 batch) has rather Wallace-like - of Wallace and Gromit - mittens. More the size of baseball gloves than human hands! I might well use a different figure. Probably one from the Caesar tank crew set.
This kit has rubber-band tracks, with some of the usual problems - they're hard to glue together, they don't sit properly on the drive-wheels, etc. But in the end they look alright to me. I like the interior detail. I'm wondering how I'll paint it, given that most of it'll be nigh on invisible, once the kit's completed, even with lots of the hatches open.
With the lower hull completed, more or less, it's the turn of the upper hull. Lots of detail here, including most of the hatches being cast as separate parts. The three mechanical access hatches (well, the middle square one is more of a plate than a hatch) on the very front, and the three over the engine at rear, are free of any internal detail. Whilst the two on the upper casemate directly below the turret/gun (inc. the driver's) have a little internal detail. I'll return to the reason for mentioning this when I get to the turret.


Using my PCB drill set - which I use as finger-drills at present - I opened a hole for the front light (see above pic). There's a peg on the bottom of the light itself, but no hole to receive it, nor any instruction to make one. But I thought I'd prefer to open one up than snip the peg off and glue the light flush flat to the upper hull. As the pic below shows, I'm leaving plenty of hatches open on the hull. I didn't fit the rear right engine-cover hatch, as I needed to determine how to approach the internal detail.
Construction of the turret begins. This is the first 1/72 kit I've ever seen or made that has this kind of internal detail. Which makes it both notable and fun! First the lower and internal turret features go together. Then the upper turret.
There are lots of pics relating to the turret side hatches, as these also had no internal detail, and yet I wanted to leave off the schürzen and model them open. This is why I mentioned the lack of internal detail earlier in ref to the hull hatches: despite there being many separate hatches, the options for modelling them open are constrained by one's desire or willingness to adapt the model. As a kid I've perhaps have built them any which way and left them just as they are. But as an increasingly hoary ol' timer, I want to start bothering about these obsessive details!
The above pic shows the lack of internal detail on the turret side hatches, and the presence of ejector pin marks. Also worthy of note is that the hinge detail is only visible when the hatches are modelled closed. So in the two pics below I've filed the internal surface flat, and cut off and flipped the hinge detail through 180°, so it'll show with the hatches in the open position.
Alas, the detailing is rather coarse - in my defence, I haven't done much alteration or scratch-building yet - but the next two pics show the detail I added to the internal surfaces of the turret hatches. Both left and right have handles at the bottom; the forward hatch has a vision slot (I need to cut a tiny groove in these if poss!), whilst the rear has a kind of release mechanism. As the second pic shows, the circular cupola hatch has internal detail.
The three parts of the turret assembly are all built now, but I need to do some internal painting before they are glued together. I took a bit of a break at this juncture, to think about how to paint these internal areas (of both tank body and turret).
Another challenging element was the inside of the right hand engine-cover. This appears to be - in the ref pic way up near the top of this post - a large boxy construction, with fans at the bottom facing the engine, and the flat grille on the top. When opened up these elements are practically reversed, with the grill underneath the large-ish box, and the circular fan blades on top. I built the basic boxy part from thin plastic card.
Once again my detailing is really rather coarse. Hopefully I'll get better at this sort of thing with time and experience? I tried to find some kind of thin plastic tubing to make the outer ring. But I wound up cutting off the circular bases from some Plastic Soldier Company tank commanders, as they were the closest thing diameyer wise to what I wanted, and then drilling and hollowing them out! This was very time consuming, but quite good fun.
The smaller central circular elements are made from a stripped cable. In fact these parts were the plastic jacket for a wire within a wire. I pulled out the very fine copper cable, and glued them in pace using super-glue (I tried styrene solvent, and it worked for one, but not the other!). I also removed a blocky styrene handle from the top of the hatch plate, and substituted a wire one. In the second pic below you can hopefully see how I sliced off the tiny hinges from the outer surface of the lid, so I could re-apply them to the inner surface.
I forgot to take any pics of the painstaking process of trying various methods and materials for the fan blades. I tried using the thin wire I've been using for grab-handles, which has a tiny rectangular profile seen in section. But this turned into a fiddly and frustrating nightmare. In the end I used thin plastic sheet. Not really thin enough, but this was almost as tough as trying to use the wire had proven to be.
Hopefully these areas of modified and/or scratch-built detail will look okay once painted. Hmmm? Well, we'll see, I guess! Next time I need to do something like this I'll certainly take more trouble over it, and I might perhaps even use it as an opportunity to make my first resin castings.
And finally, to finish (for now at least!), some pics of the various components undercoated in black. I added what I assume is some kind of drive-shaft element to the underside of the fans, using more plastic wire tubing, with a short length of jewellery wire threaded through the two parts. I think this scratch built part now looks okay, if admittedly a bit too chunky. When I get another moment I'll post some pics of the BMW motorbike and sidecar combo, and the figures that are riding that.
But to sum up for now: so far this has been a very enjoyable build. I'd definitely recommend this ol' kit.