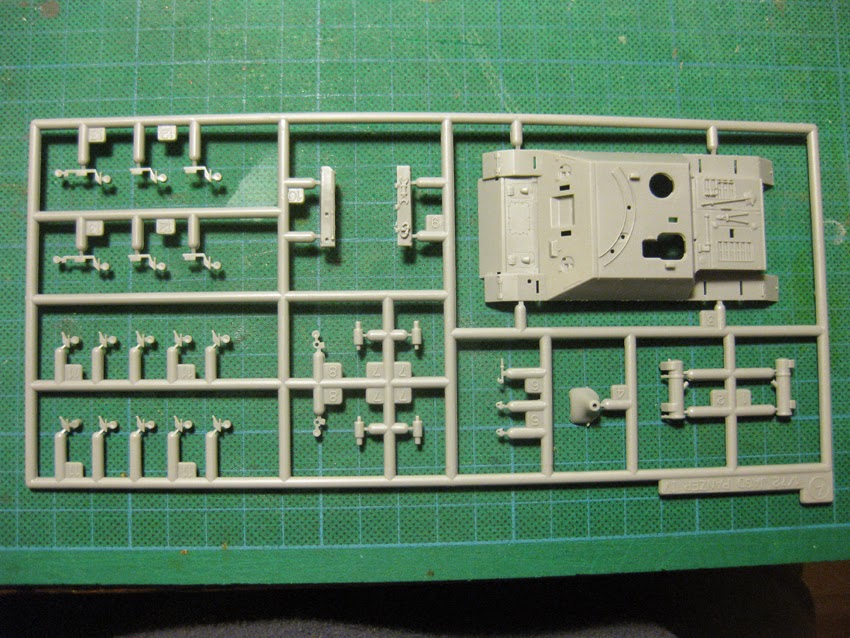
This is my first ever Attack kit. They're an entirely new name to me in 1/72 models, as are many of the Eastern European manufacturers. I don't really know quite why I was drawn to this particular Pz. 38 variant - there are so many, and Attack themselves do a good number of variations - and I subsequently discovered, in my researches on reference for the build, that it was (someone correct me if I'm wrong) a one-off prototype!


Above we see the box contents: mostly a rather fudgy grey polystyrene (and by fudgy I mean the styrene is kind of soft and waxy, rather being fudge coloured!), some minimal decal options, a photo-etched antennae, lots of resin parts (both interior and exterior details), and the instructions.
I actually really enjoyed making this kit, but I have to say that the box art is pretty cruddy, and the instructions are of a similar quality. Still, the proof of the pudding is in the eating, and whatever my misgivings about box and art and instructions, this was a satisfyingly filling and nutritious model-making repast.


Like the great majority of AFV kits, the build starts with the chassis/running gear. There are several noteworthy aspects to this particular kit: the wheels weren't brilliantly moulded, and needed lots of cleaning up, involving everything from getting them relatively circular to opening up the 'female' parts on the revers inner hubs, so they'd attach properly to the 'male' bits on the chassis; the drive wheels feature something I don't think I've seen elsewhere, in that they don't have any teeth in the areas where the tracks will be. This is actually an excellent design feature, as, unless the model teeth correspond perfectly to the respective holes in the tracks - and in my limited experience of 1/72 model vehicle building (thus far) they very rarely do - then the result is tracks that dont sit satisfyingly or realistically around the drive-wheels.
Although I haven't seen another kit with the drive wheels supplied sans a good number of teeth, as here, the Ace RSO I built a little while back had instructions directing one to snip of the teeth where the tracks would lie prior to fitting the (enormously laborious to build) photo-etched metal tracks. The innovation doesn't end there either; the tracks themselves are made from two longer straight styrene sections, and then two shorter curved resin segments. These aren't the greatest tracks I've ever seen - the inner track detailing is very primitive indeed - but the design principles are, I think, very good. Potentially such ideas could be taken further and improved. It seems to represent a halfway house between link-and-length and old-school rubber band tracks, being a lot easier to build than the former, and (potentially) a lot better and easier to glue than the latter.


There are a lot of model variants on the Pz 38 chassis, just as there were a lot of tanks back in the day. I dont know if the scrappy approximate nature of the instructions is, in part perhaps, a result of this situation? The upper-hull/casemate that sits atop the instructions has two protuberances, neither of which appear on the body as illustrated in the instructions. After much study of the instructions, and other Pz. 38 reference material, I simply lopped these off.
But the lack of clarity in the instructions, combined with the paucity of info on this rare prototype on't web, lead to much wasting of time. However, once the scalpel had done its work, the vehicle came together pretty quickly, and was looking pretty nice to my eyes. In the above pics the upper and lower parts aren't glued yet, they're just sitting atop one another so I can enjoy the look of the vehicle, and for illustrative porpoises.


Adding further bits unt bobs to the body of the vehicle. The bits in the pics above are all parts of the kits as supplied (there are many redundant parts in the box, doubtless these are used in some of the other variants on the Pz. 38 chassis. In the pic immediately below are some extra items, paraphernalia for the fighting-compartment, from another source. In the second pic below my efforts to create a grid of holes on a stowage box can be seen to be a little slipshod!


Painting got underway, with a black undercoat followed by hairspray and my own 'patent' elfnbein interior mix. Below you can see the work I've done so far on painting and detailing the fighting compartment. This was a great deal of fun!


Next I worked on some further exterior detailing, including my first attempt at modelling some wire handles, to replace the rather chunky styrene ones on the model.


I'm not sure if I did the breech-block end of the gun in elfenbien of basic panzer yellow? I think it's elfenbein, hence the reasonably thorough masking of the fighting-compartment, as shown below. The rear of the vehicle was a bit of a bodge, involving cutting a strip of styrene from some sprue, in order to get the rear plate and exhaust to all sit relatively 'correctly'. I saw some pic of the exhaust with a perforated mantle. But after my efforts on the rear deck stowage box I passed on this modification!


The last significant additions were the schurzen. They weren't a brilliant fit. But they were a damn sight easier and more obvious than the rear mudguards (or 'fenders' for y'all Stateside), which I agonised over for quite some time. The instructions were next to useless in regards of these items. So it was only thanks to lots of internet research time that I finally settled on how they ought to be positioned


So this is, more or less, how this unusual vehicle now looks. Actually I've removed the masking, so I really ought to post some photos of the vehicle as it is now, with the fighting compartment visible. But time is tight, as ever. So this'll do for now! I hope these unfinished armour posts are nonetheless either of use or enjoyable?
So, in conclusion (for the time being at any rate!), I'd describe this as a far from perfect kit that is nonetheless highly interesting, and has the potential to be both quite frustrating, and yet, oddly, enormously fun to build.