Showing posts with label decals. Show all posts

Monday, 15 July 2019

Kit Build/Review: 1/72 Airfix Focke Wulf 190A-8/F-8


I recently acquired a batch of 1/72 WWII German aircraft from a chap at the Wisbech IPMS - thanks Sean! - including an ancient Airfix Focke Wulf 190 kit, as pictured above. The instructions look like they're on parchment, and have that ancient musty smell (a smell that, as an old book-sniffer, I rather like!). They look brittle enough that a strong breeze might see them crumbling to dust. The decals are petrified and useless. But the model itself appears ok, and all present and correct, albeit some parts have been removed from or have simply fallen off their sprues.

Fossilised decals and ancient papyrus instructions.

But at least all the bits are here.

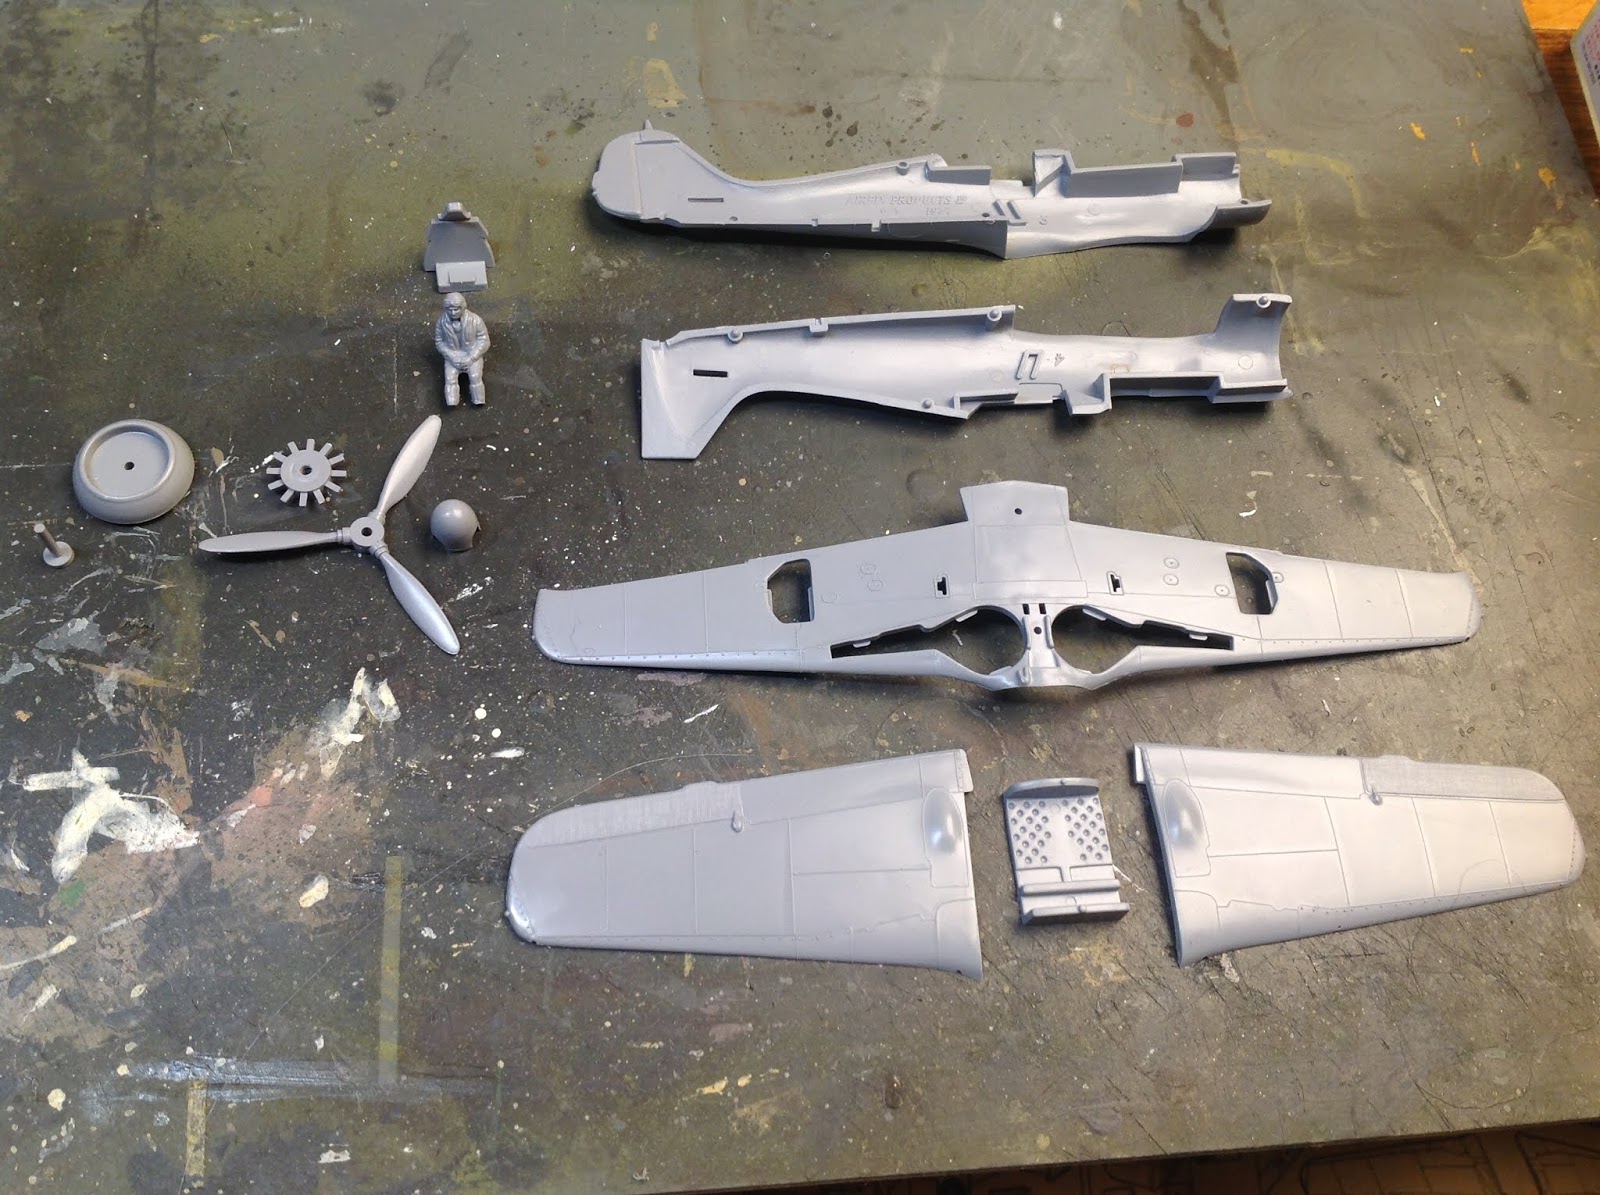
Starting to lay out and prep...

I have a few books that might make for potentially useful ref'. I always like to go to something for colour ideas, particularly as I never seem to remember which colours apply in any given situation. The internet's great for this. But I like having hard copy materials to hand. Especially at present, when all my Apple gear is blighted by recharging issues. The glossy A4 magazine style publications you can buy, as I have, on the High Street, such as Luftwaffe Fighters, by Claes Sundin, are my current go to resource for planes such as this.

Very handy.

Onto the build: as usual I forgot to do certain steps. In this instance drilling some holes out in the wings for the appropriate choice of bombs or landing gear, or whatever it might be. And then I make my usual build booboos, such that the propeller on this kit probably won't wind up (boom-boom!) being able to turn. But in all honesty, I'm past caring. I just want to build the models without being too fussily perfectionist, and enjoy the process.

Early stages of assembly.

Painted pilot in situ.

Cockpit canopy frame masked, and inner colour applied.

The state of the decals in this fossilised kit mean I'll be presented with an interesting challenge when's it comes to markings: have I got any/sufficient/appropriate decals anywhere in my stash? Or will I have to paint them with masks, and whatnot? Even if it goes the latter way, I'm not fussed. Indeed, I think it'll be fun. I doubt I'll bother with much cockpit detail in this instance. I have a number of Focke Wulf kits in my stockpile. I'm more interested in getting several built and painted than achieving specialist publication levels of finish.

Two types of masking: sharp and soft-edged.

Post masking reveal... looking you'd.

In the end the prop' on the Focke does turn. The one on the Airfix Me 109 beside it, above, doesn't! You can't have it all, I suppose. But, of more interest to me, I tried a slightly new (to me) painting technique, with raised masks, to create feathered edge camo'. I'm pleased with the results.


After a hiatus of several days, during which I worked on the Revell WWI Fokker Eindecker featured in another recent post, and various house and home type jobs, I got back to this plane, and an old/new (older build, for me, of a newer kit!) Me109.

Yellow markings masked.


The first of the next few steps, prior to a glass coat and then decals, is to mask off and paint the various yellow areas, such as wing tips, rumpfband, etc. Once again the Claes Sundin colour profiles were my general inspiration. But rather than, as some do, trying for a specific pilot's plane, I'm going with a more generic freestyle pick'n'mix approach.

In the end these yellow areas were under-coated white with brushwork, then airbrushed yellow (two coats of a custom non Model Air mix), and then given a final brush coat. I'd have preferred to just airbrush the lot. But I find my airbrush clogs too much when I use my own non Model Air mixes. As I often say, I remain a long, long way from attaining the coveted level of airbrush ninja!

And revealed; cf. with the Bv141.

I believe I painted the Bv141 pictured above with freestyle choices of colour, in terms of the two shades of camo' green. But I didn't write down exactly what colours I used (damn fool that I am!). The more recent Me109 and Fw190 were painted with Vallejo Model Air colours specific to the appropriate German RAL numbers. I have a post somewhere here on the blog about German WWII colours. I intend to improve and expand upon that at some point soon, and include more Luftwaffe colour info'.

And one other very noteworthy thing: during handling I continually broke off everything from delicate extremities - aerials, machine-guns - to larger parts, like flaps, and even tail wings! My pal Paul has a method of working that I can see is useful for preventing or minimising such risks, where he leaves the prop' off and has the whole airframe attached to a stick. Think I might have to adopt a similar strategy!

Anyways, that's it for now. I've got a busy day today, with a large number of my drum pupils at one of my schools performing in an assembly, and a vintage fishing rod to be collected, after which I'll be checking in on the above mentioned Paul. Still loads more to do. But decals and further painting will have to wait for now.


Working on decals.

Another day, and the painting is mostly complete, albeit very basic. Painting the spirals on the nose cone/spinner things was a right old tester. I tried numerous approaches. In the end combining spiral masks with freehand-painting. Phew! I then gloss-coated the two planes, ready for decals.

The balkenkreuz on the sides of the Focke's fuselage are leftover transfers from the Airfix Bv141. On the upper and lower faces of the wings I've used Swiss air force white crosses, as supplied in an Airfix Me109 kit. I'll mask and paint the black parts in later.

Getting the decals positioned correctly - or rather to my own satisfaction - was very tricky, and took ages. I used Humbrol Decal Solution to set them in place, and a Vallejo decal medium to make them confirm to the surface features. There are still a good deal of decals and markings to be added. But that'll have to wait!

Wednesday, 10 July 2019

Kit Build/review: 1/72 Revell Fokker E.III

A nice vivid green!

I started this kit aeons ago, and I'm not even sure if I documented the first part of the build. Not that it really matters one way or another. At this point I've masked off the propeller and cockpit, and I'm airbrushing the base colour for the body. I looked at loads of Eindekker pictures online, and ultimately decided to freestyle in colours of my own choosing, similar to real examples, but according to my own whims.

The undercarriage view.

I liked the designs that have coloured bands around the fuselage, including as illustrated on the box. So I retained that element of the design. I even copied the decals onto masking tape, to try and get approximately correctly sized stripes. But I goofed on this account, resulting in the central white band not being as wide as it should've been. Still, never mind!


Masking fuselage stripes.

As alluded to above, there were in fact decals for the coloured bands (or the black and red ones, to be specific), but I decided I'd prefer to paint them by hand. And that meant brusha-painting them, not airbrushing them. As usual, airbrushing is both a wonderful and yet tricky and annoying process. In this instance the base green for the body of this plane was mixed from ordinary (not Model Air) Vallejo acrylics. It needed diluting a bit to get the right flow consistency. And I used a custom colour mix, as usual forgetting to make a note of the mix colours/ratios. It was easier than normal or expected on this occasion. But the airbrush did clog up, as it so often does, requiring a complete strip down and clean... again. Ah, the joys of the airbrush.

Getting decals ready to apply.

I'm still sufficiently inexperienced that every time it comes time to add decals, it's (usually) a bit of an ordeal. They stick to my fingers, they won't stay put where I want 'em, no matter what decal fix I use they don't want to lay flat or conform to the surface they're being applied to. But as they really do add a certain crisp level of finish, I want to use them. I hope as time goes by and I get more experienced, I'll get more adept at applying them.

Nearing completion.

Far from perfect, but looking ok.

Yet another kit that's fairly well along, but not 100% finished. Still, I'm happy enough with how it's going. Next, another gloss coat - I did one prior to adding decals - then I need to find and add the propeller, and do the rigging. But all in all, I like this kit, it's a fun little thing.

Tuesday, 23 April 2019

Kit Build/Review: 1/72 T-34/85, Revell


Revell are known for modelling excellence, and this kit conforms to that standard. Is it a re-boxed Esci model? I don't know. But it does have Esci-style patented 'link and length' type tracks. Not everyone's cup of char, on account of their fiddliness, they can be great, or a real headache.

Laying out parts for pre-build clean-up.

At the time of typing this, I've only just started making this kit, having been on a bit of a T-34 binge, building, in total (including this tank), ten T-34s over the last week or three. These have ranged from Armourfast and Italeri quick-build wargamers kits to more detailed offerings, such as this one, and two Zvezda snap-fit T-34/85. The closest to this Revell, in terms of detail, was the Trumpeter T-34/85 I bought ages ago, from the shop at the Muckleborough tank museum.

Like many 1/72 tanks, this starts with running-gear.

Also visible in these photos are a batch of scratch-built tow-cables for the simpler Armourfast T-34s, etc. I've made six, plus I have a seventh left over from (I think?) the Trumpeter kit. Below are a couple of pics I took even earlier, during the process of making the eyelets for these cables.

Making eyelets for tow-ropes.

Establishing a suitable cable length.

I couldn't get a suitable weight of cotton thread at any of our locals craft supply stores, and I didn't want to wait for an online order to arrive. So I went to a nearby fishing tackle supply shop, looking for rod-binding thread. They didn't have any. They did, however, have some suitable braid. RRP was a rather steep £5.95, but the guy in the shop, not wanting to empty his till changing my £20 note, let me have it for about £1.50! Which was all the change I had on me. Close inspection of the braid shows it to be just that. But at a glance from a distance it looks fine.

Making a start on the 'Lincoln-Length' tracks...

... using Tamiya masking tape to bind the parts together.

As ever with these types of track, it was hard work.

And done. For tonight, anyway...

Turret hatches up. Shame the driver's hatch wasn't open-able.

And that's that, for this evening, at any rate. A lovely model, even though the link'n'length makes things rather heavy going. That's my tenth T-34, of which nine were built over the Easter break. I still have several two-cables to add, and with the turret hatches open on this latest one I feel the need to detail the internal/undersides a bit.

I might even try and do that lot this evening, so as to be ready for undercoating and painting, next time. But I really ought to go to bed, what with my first days teaching since the Easter break being tomorrow.

---------------
Well, I went to bed, like a sensible adult (for once). That meant I didn't attach my scratch-built tow-cables until this evening. And I'm thoroughly pooped after my first day back at the goal face. Watching Jack Lesowski play Ali Carter on the BBC iPlayer, snoozing intermittently! But here they are, attached to the four Armourfast kits. I'm quite pleased with my detailing of these kits. The tracks are awful. But thankfully they'll be largely unseen.


Monday, 25 February 2019

Show Report: On Track, 2019

'Twas a gorgeous sunny day.

I went to Folkestone with my buddy Paul yesterday, to On Track, at The Leas hall on the seafront. I didn't take any pictures of the countless superbly made models. Indeed, I didn't even really spend the time admiring them that perhaps I should have. All the effort expended on them, and I just walked past!

I've been to Euro-Militaire a couple of times with Paul, and enjoyed it. But I thought I should try On Track, as it's more armour/vehicle focussed, whereas at Euro-Militaire it's more figures and all sorts, and a lot less armour, etc. And I'm very glad we went, as it really is much more up my street.

The Fujimi Kübelwagen plus mc/sidecar, my first purchase of the show.

The main reason for going was not to admire others' work, to buy more models, and - I hoped - a few related bits and bobs. And I wasn't disappointed. I had a list of things I was interested in, and was able to get a whole bunch of stuff I've been lusting after. I'd even gone to the trouble of raising some cash specifically as spending money.

The primary thing I was after was rear-echelon vehicles: trucks, cars, etc. I also wanted some vehicles of a similar ilk that could either be military or civilian. In addition to this there were some kits I'd seen browsing online that I was able to purchase. One, the Phanomenon Granit by Attack, was on my list. Another, the V2 and Hanomag SS100 transporter, by Takom, was something I'd only just noticed online, but really wanted. I didn't expect to be getting it at the show.

This looks like it'll be a lot of fun to build!

Two near identical staff cars, from Ace.

Most of my purchases were from Dutch dude Rob Tas of Tas Models, a thoroughly nice guy with an excellent selection of kits. Most of his kits at the show were 1/72, and there were a lot of German WWII models. And his prices were great. Paul bought a brand new Roden WWI truck and gun/limber kit off him for £10, which another stall at the show was selling secondhand for £27!!! This other stall also had a nice Vomag bus, and an Einheitsdiesel truck. I really wanted both, the latter being one of the vehicles on my wish list. But again, they were - in my view - overpriced. So I left them alone.

I also wanted some written and pictorial stuff, for reference. But I had to be careful: Avid Publications had £65 off me for just one book last time I was at the Leas (that was for To The Gates of Moscow, by Türk/Urbanke). I was primarily looking for stuff in the same area as I was re models, softskins, and suchlike. I'd seen online and was intrigued by a new book on German staff cars. Ironically they had copies on the overpriced secondhand kit stall. I had a look at it, but, along with a number of other titles on the Avid stall, it seemed too expensive for the amount of material.

Useful ref for truck building.

I did find a Nuts And Bolts title, pictured above, on German trucks, which, at £26.50, whilst far from cheap, seemed at least to be decent value, in terms of the quantity and variety of material. As well as beaucoup de contemporary photos, there are line diagrams, colour plates, and even model build examples, covering a wide and interesting range of German trucks. So I bought it, with a view to perhaps scratch-building some vehicles using it.

I would've liked to have bought a kit or two (their propaganda halftrack appeals, with the loud-hailers on the roof!), or at least some ancillary stuff (fuel cans, ammo boxes, etc.), from Model Trans Modelbau. But once again, high prices put me off. My most extravagant spending at the show was on two sets of resin Panzer crew, at £8.50 each, from Dan Taylor.

Einheitsdiesel with flak, and Phänomen Granit.

Fingerprint decals, inc. softskins markings, and Dan Taylor panzer crews.

One thing I was really hoping I'd find was a set or two of German WWII softskin decals. In particular the rectangular info markings that you see on the doors of trucks, RSO, and suchlike. Pictured above is a set I bought off a trader (who?) who otherwise specialised in Allied WWII materiel. Apparently Fingerprint, who made these decals, are now defunct. Dan Taylor said he's going to be bringing out a suitable set some time soon.

Anyway, Paul and I enjoyed the show. Paul only bought two kits, both WWI, and nowt else ('crept a couple of beers; cheers Paul!), whilst I bought quite a bit of stuff. Definitely a good show for those of us who like building mini-military stuff. They have a lot of 1/35 and other scales as well, and the various traders cover all sorts of eras.

But for me it was about having a big range of choice in 1/72 WWII, and German stuff mostly. And I was far from disappointed. Indeed, if I'd had more money I'd have splurged considerably more! Tas had the 1/72 Hobbyboss German super railgun, at £140... I'd love to buy/build that!

Sunday, 29 October 2017

1/72 Armourfast Shermans


Armourfast themselves sell these kits for £7.50 per box; I recently acquired four of their several different Sherman variants at Euro Miniature Expo, for £6.75 each. Considering you get two tanks per box I think that's pretty good value, in terms of cost per tank.

However, these are most definitely wargaming models; Dragon or Trumpeter they ain't. If you're buying tanks for a wargaming army, as indeed I am, the fact they're cheap, simple to build, and - due to their simplicity and lack of fine detail - robust enough to withstand frequent handling, are all potential pluses.


Simple kits = easy/quick build.

Assembly line in production!

'Finescale' modellers, looking for display-case suitable single vehicles should look elsewhere. For myself, I don't mind - in fact I quite enjoy - the detailing and/or conversion of my models. Fabricating my own detailing for these Armourfast Shermans has been a fun project. 

I started by adding all the 'eyelet' type rings; I think these are for lifting the tanks during transportation, but possibly also they're for mounting cables/stowage, etc. After that I made the 'wire-frame' style doodads that I suppose are for covering/protecting the headlamps. This was harder, and more time consuming. I'm currently pondering how I might add track-tread detail, to the visible fore and aft portions of the tracks.


Wire eyelets added.

At the rear of the turrets I opted to use styrene for the final eyelets.

The models not only lack detail, but come without decals. Armourfast sell some suitable stuff by Black Lion via their website. They also stock/sell numerous add-ons, such as stowage and the like, for detailing their tanks. The extra costs in these areas, plus the time you might choose to spend working on these very basic kits to enhance them, make them more costly in real terms than the box price might suggest. But they'll still come in cheaper per tank than the more high end models.


Headlamp protection, attempts #1 and #2: left, too big/thick; right, too fiddly to mass-produce.


Left, nigh on invisible, right, too big!

Attempt #3, using plastic-card. Much better.

I also recently purchased a box of Plastic Soldier Co. Shermans. These come three to the box (this said, my box - bought at local charity shop for £5 - only had two!), and are slightly more detailed, with more pieces to assemble: of particular note, the Armourfast running gear (wheels and tracks) are one piece castings, lacking tread detail (which can be a nice aspect of the various Sherman types), whereas PSC are three piece, with much better detailed track. But, in the end, the PSC kits end up costing the same per tank, roughly, as Armourfast models.


Tow-cable eyelets added to all six U.S. Shermans [1].


Scrtach-building a pair of sirens.

The sirens in situ.

Rear lamps were also added.

The M4A2 75mm variants got several tools added at rear.

The M4A3 105mm (centre) have less rear detail; M4A3 75mm (right) sport large stowage bins.

So, if you're looking to build quick/cheap larger forces, Armourfast are, economically, a wise choice. If you find the fun of kit building resides in off-the-shelf hyper detail, buy a different brand. If you like detailing stuff yourself, as I do, then the limitations of these models present an interesting challenge. All told, balancing the lack of detail against value per model, I'd rate these at four stars/balkankreuz.


Halfords matt grey undercoat.

Viewed from the rear.

Humbrol acrylic olive Drab aerosol sprayed on.

And from behind...

So, that's how they look at present. The losing of my Images of War reference - I bought a book dedicated to pictures of Shermans in WWII at the recent Expo, specifically to help me detail these kits - is very galling. I'll return to these at some point soon, to add more stowage, populate them with some figures, add decals, and then, finally, weather them, etc.

----------
NOTES:

[1] I've built the Armourfast Sherman Firefly variant, a British type, but they're not covered in this post.