

This is only my second WWI aircraft model, and, as with the first, a Sopwith Camel, I'm almost surprised to find myself favouring British hardware over German! A trip to see the Shuttleworth Collection inspired me to buy and build this kit, with a view to making it look something like theirs.

The Shuttlworth Sopwith Triplane, incompletely restored, as it was when I visited.
Actually that ended in creating a few difficulties, as that particular plane recently crash-landed, and still wasn't fully restored at the time I saw it. So I had to seek out further reference pics online, so as to check a few details. The Shuttleworth Sopwith Triplane still hasn't had the cowling on the nose repainted, or the prop put back on. And she has wire-spoked wheels, as opposed to the usual solid wheels you see on Sopwith fighters.
The undersides of the wings are very nearly white, in my pics from Shuttleworth. But I noted that most Sopwith Triplanes, including this one prior to the crash, usually have that creamy latté colouring on the undersides. I'm not sure what I'll do; leave it white, or go for the coffee colour?

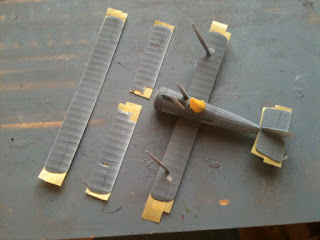
After spraying the underbelly etc. white, I masked those areas off, ready for a coat of chocolate brown. It was quite a while between doing the masking, and, today - finally and for the first time ever! - using my (fairly) recently acquired airbrush.
I mixed Vallejo acrylics in the reservoir of the airbrush, and diluted the resultant colour with a little water. Although I was chuffed to finally start airbrushing, I wasn't altogether happy with the colour. So I boldly mixed a better shade, and hand painted a diluted layer, almost a wash, over the airbrushed coat of paint.


I'm now fairly happy with the colour I achieved, even though it still doesn't quite match the colour on the postcard of the plane that I'm referring to for ref. I'm leaving it here for the night now. Hopefully tomorrow I'll finish the landing gear and prop. Then it's just decals, rigging, and (perhaps?) some weathering.


Masking viewed from above...

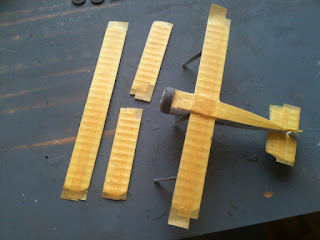
... and below.
I mixed Vallejo acrylics in the reservoir of the airbrush, and diluted the resultant colour with a little water. Although I was chuffed to finally start airbrushing, I wasn't altogether happy with the colour. So I boldly mixed a better shade, and hand painted a diluted layer, almost a wash, over the airbrushed coat of paint.


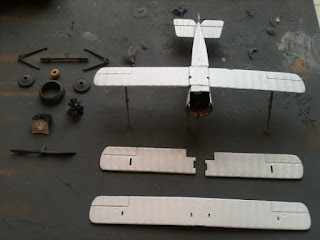
The kit itself, probably quite an old tool, so to speak*, is OK. Like the Sopwith Camel it's a simple, minimal kit. There's some flash to be cut away, and ejector pin nodules to remove, or holes to fill. Parts fit OK, but with some gaps or less than ideal alignment. But these kits are cheap, quick and easy to build, and good fun. I intend to build more!
* It struck me that this phrase might aptly describe many an ageing modeller, myself included!

An older version of the model, at least in terms of packaging.
UPDATE:
Lassitude won out tonight. I had hoped to do a fair bit more to the Sopwith Triplane. But all I did was attach the prop and the landing gear, and touch up some little details paint-wise. Decals, rigging, detailing and weathering will have to dance attendance upon time and energy!

I do like the 'chocolate triplane' look!


The pilot can be seen better in this shot. Still plenty to be done!
No comments:
Post a Comment